To The Window, To The Wall - One Room Challenge Week 4
- Amber

- Oct 24, 2019
- 3 min read
Hello! If you are finding me through the One Room Challenge, it's so nice to meet you! I'm Amber, a wife and mother of two toddler boys and a sweet, floppy golden-doodle. We live as renters in my grandmother's home which she graciously lets us have our way with. I have an eclectic style and love fun colors. My main purpose in my blog is to teach people that with creativity, imagination, and a little bit (sometimes a lot a bit) of work, they can make their homes what they want without breaking the bank. Thank you so much for stopping by! Be sure to head over to my instagram, Homemaking Homebody, to see real life updates in my stories.

We're on to week four! If you haven't seen the stages of this room transformation, check them out!
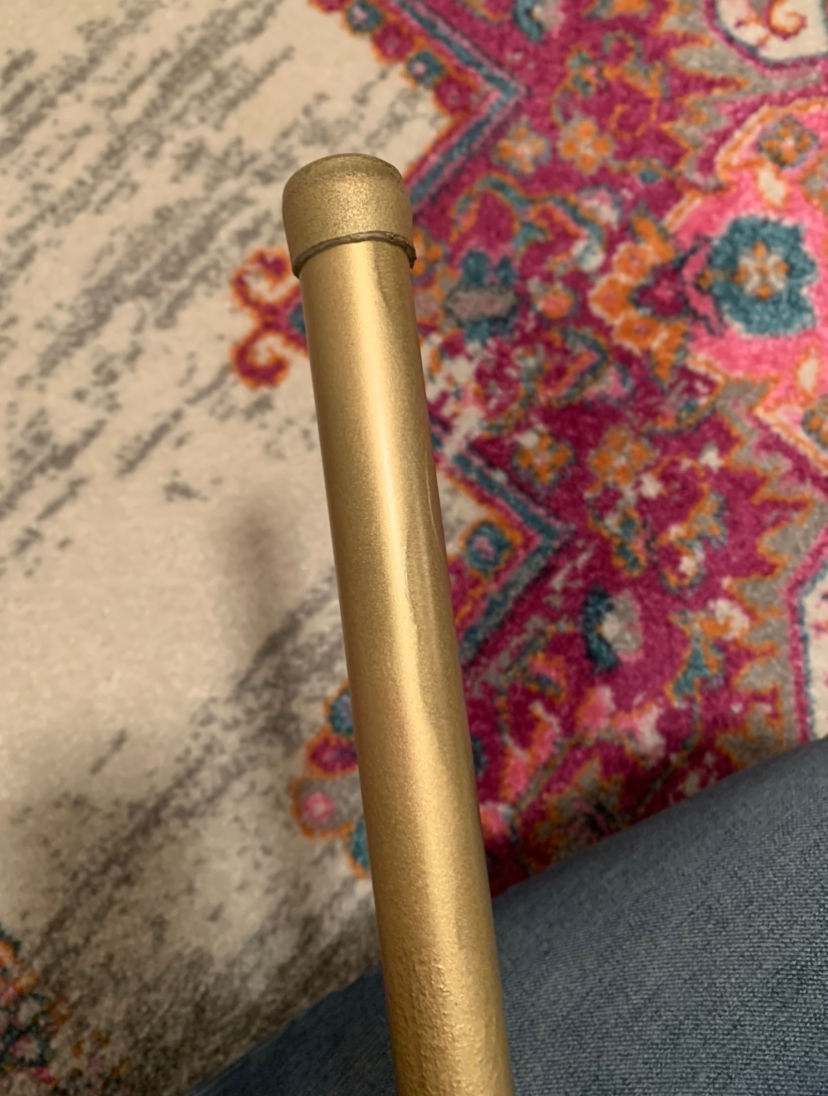
Okay! So for this week I focused on two things... The feature wall and our giant window. I knew I wanted to make a curtain rod, and thankfully a designer I follow had a really good idea for one that she uses in her home (check her out on Instagram, @kelseysigarsdesign). It is a West Elm dupe for not the West Elm price.
I bought a 10 ft section of copper electrical conduit. We only needed 9 feet (Like I said, giant window), but I went ahead and spray painting the entire thing gold.

I also spray painted plastic chair caps and wall hooks gold. The entire purchase from Home Depot was $30, and compared to a "custom curtain rod", that's a steal.


Once they had dried and we cut the rod to the size we needed, I stretched the chair caps out and put them on the ends.
Then my husband drilled into the studs above the windows and twisted in the hooks.

Finally I put the curtain on the rod and just placed it into the hooks!

I placed the rod higher than the window to add the illusion of the ceilings being taller. In a small room, you need all the help you can get to make it feel larger. I also have about a foot extra of rod on each side of the window. Now, this window doesn't need help to feel wider, but having the curtains NOT cover the natural light, help keeps the room bright. Since it is the only window, I didn't want to compromise the amount of light it got.
Now wait, is that shiplap on the wall?? NOPE. It was done with a sharpie.
For the Sharpie-lap I needed a level, a ruler (I used a yard stick), a pencil, a Sharpie Paint pen (don't use plain Sharpie or you'll have a hard time painting over it later), and a motivated spirit!
I will be adding wallpaper above this and chair rail to separate them.
First I took my yard stick and measure my "boards" to be 6 in. each. I marked every 6 in. up until I reached my desired height.

Then I held my level up to each line, made sure it was actually level, and then traced along with pencil to create a straight line.

After that I drew random straight lines vertically to make it seem like actual boards.

Then I carefully traced with the paint pen over the lines. Now I know this isn't a perfect system, but it adds a fun bit of interest without breaking the bank.

I'll be going back over the lines with the pen once more, and cleaning up the edges with some white paint, but I already LOVE IT!
Have you ever attempted a sharpie wall?
Be sure to follow along the next five weeks here and over on my instagram, Homemaking Homebody, so that I can get to know you and you can see real life DIY in stories.

Thank you again for stopping by!
Let's be friends!
Amber


Comments